Have you ever wanted to try your hand at growing your own peyote cactus? Look no further, as this beginner’s guide will provide you with all the information you need to successfully grow peyote cactus from a pad. Whether you’re a seasoned gardener or someone with little to no experience in plant cultivation, this guide will walk you through the process step by step, ensuring that you have a thriving peyote cactus in no time. From the selection of the pad to the nurturing of the plant, this article will equip you with the knowledge and confidence to embark on your exciting journey into the world of peyote cactus cultivation.
Selecting the Pad
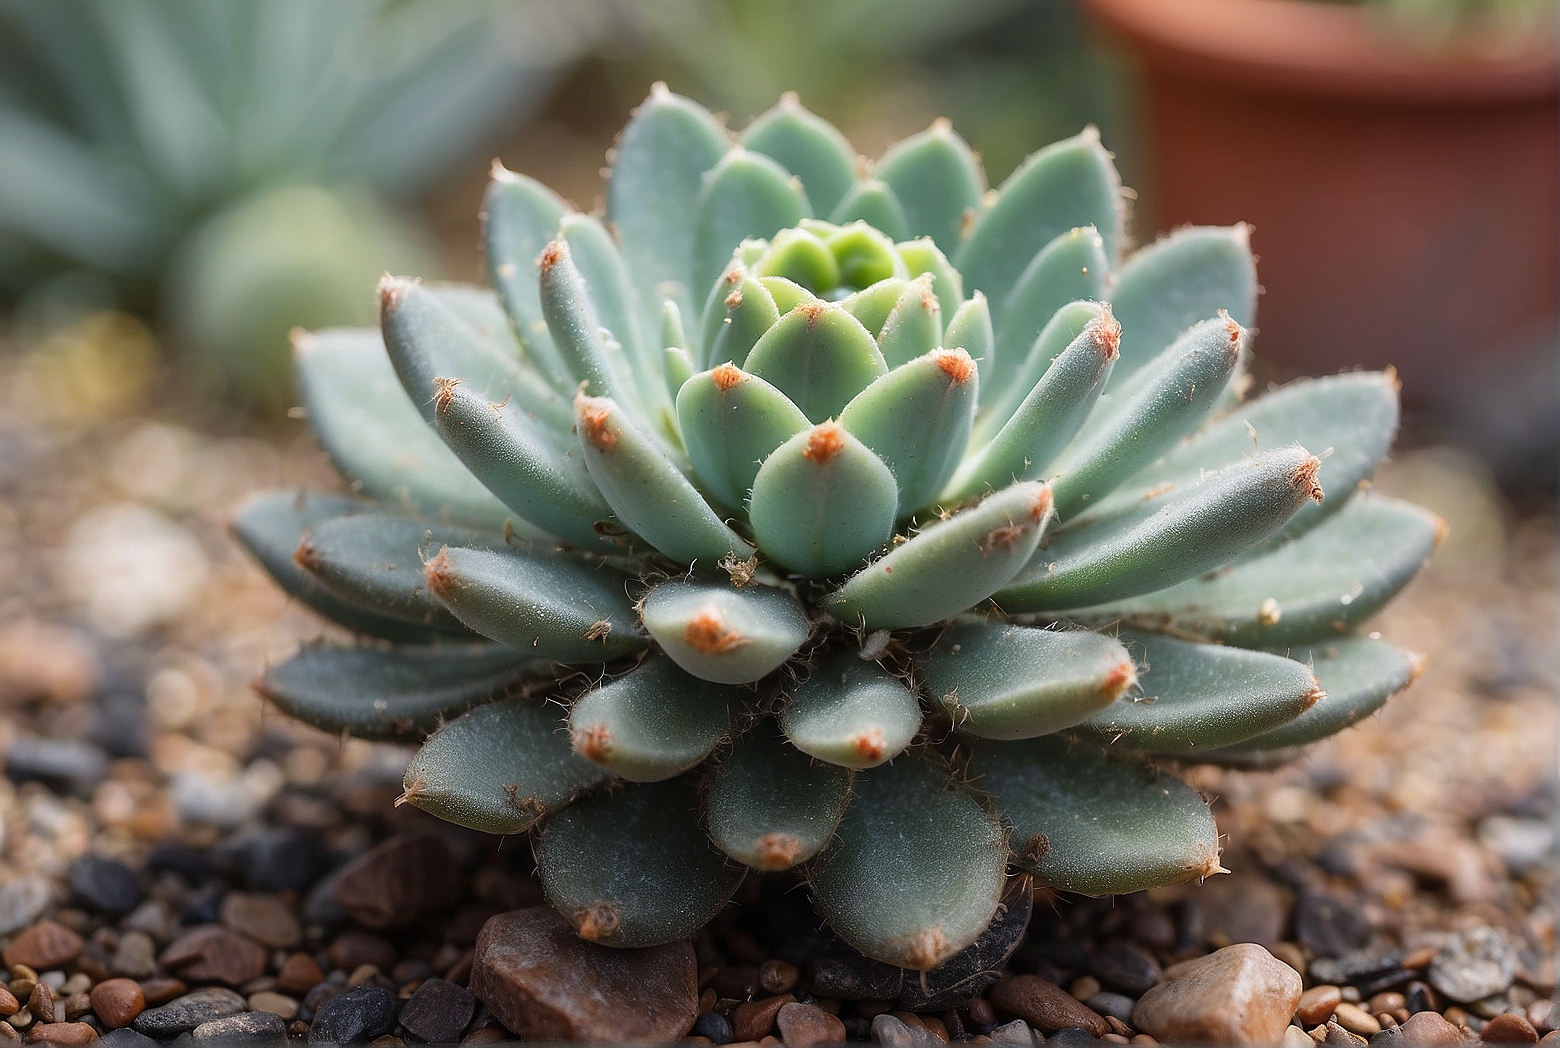
Choose a healthy pad
When selecting a pad to grow peyote cactus from, it is important to choose a healthy one. Look for a pad that is firm and plump, with no signs of shriveling or wilting. Avoid pads that have any soft spots or bruising, as these may indicate rot or damage. A healthy pad will have a vibrant green color and feel sturdy to the touch.
Ensure the pad is mature
It is crucial to select a mature pad for successful peyote cactus cultivation. A mature pad will have several years of growth and development, allowing it to have a higher chance of thriving once planted. Avoid using pads that are too young or recently formed, as they may not have the necessary nutrients and strength to establish a new plant.
Look for a pad with no signs of rot or damage
Inspect the pad carefully to ensure that there are no signs of rot or damage. Rot can be identified by soft or discolored spots on the pad, which usually appear dark and mushy. Damaged pads, such as those with cuts or scars, may struggle to grow or be more susceptible to pests and diseases. Choose a pad that is free from any visible signs of rot or damage for the best chances of success.
Preparing the Pad
Allow the pad to callus
Before planting the pad, it is important to allow it to callus. This process involves letting the cut end of the pad develop a dry, hardened surface that will protect it from rotting once planted. To achieve this, simply leave the cut pad exposed to air for a few days, allowing the moisture to evaporate and the callus to form.
Cut the pad properly
When preparing the pad, it is essential to cut it properly to ensure successful growth. Use a sharp, clean knife to make a clean cut, avoiding any tearing or crushing of the pad. Make the cut at a 45-degree angle to maximize the surface area for rooting. A proper cut will promote healthy growth and reduce the risk of infections or diseases.
Leave the cut pad to dry for a few days
After cutting the pad, it is important to leave it to dry for a few days before planting. This drying period allows the cut end to callus and protects it from rotting once in contact with the soil. Find a well-ventilated area, away from direct sunlight, and let the pad dry for approximately three to five days or until a callus has formed.
Choosing the Right Soil
Use a well-draining soil mix
Peyote cacti require a well-draining soil to prevent waterlogged roots and root rot. When selecting the soil for your pad, choose a mix specifically designed for cacti and succulents. These mixes typically contain a combination of materials such as sand, perlite, and peat moss, which help to increase drainage and prevent excess moisture retention.
Consider adding sand or perlite for better drainage
To further enhance the drainage capabilities of your soil mix, consider adding additional sand or perlite. These materials improve the soil structure, allowing water to flow through more freely and preventing the soil from becoming compacted. The added drainage will help to prevent overwatering and promote healthier root development.
Ensure the soil is slightly acidic
Peyote cacti prefer slightly acidic soil conditions, with a pH range around 6.0 to 6.8. You can test the pH of your soil using a pH testing kit, which can be purchased at most garden centers. If the pH is too high, you can lower it by adding organic matter such as peat moss or pine needles to the soil mix. Maintaining the correct pH will ensure optimal nutrient uptake for your peyote cactus.
Planting the Pad
Create a small hole in the soil
Before planting the pad, prepare the soil by creating a small hole that is large enough to accommodate the cut end of the pad. The hole should be deep enough for the roots to be well-covered, but not so deep that the pad is buried too far beneath the soil surface. Use your fingers or a small trowel to create the hole, ensuring it is wide enough for the roots to spread out comfortably.
Place the pad in the hole
Gently place the prepared pad into the hole, positioning it with the cut end facing downwards. Ensure that the pad is placed at the correct depth, with the roots fully covered by the soil. Be careful not to damage the newly formed callus during the planting process, as this may impede the root development and overall growth of the plant.
Gently press the soil around the pad
Once the pad is positioned correctly, gently press the soil around it to provide stability and promote root-to-soil contact. Use your fingers or the back of a spoon to lightly compact the soil, taking care not to apply too much pressure as this may damage the young roots or the delicate pad. Make sure the soil is firmly packed, but still loose enough to allow for proper drainage.
Providing the Right Environment
Place the potted pad in a sunny location
Peyote cacti thrive in bright, indirect sunlight. After planting the pad, choose a sunny location for its new home. Ideally, select a spot where the cactus will receive at least six hours of sunlight each day. If growing indoors, place the pot near a south or west-facing window to provide sufficient light. The intensity and duration of sunlight will directly impact the growth and overall health of your peyote cactus.
Ensure the temperature stays above 60°F (15°C)
Peyote cacti are native to desert regions and prefer warm temperatures. It is essential to maintain a minimum temperature of 60°F (15°C) to ensure their well-being. Consider using a greenhouse, if available, to provide consistent warmth. If growing indoors, choose a room that remains consistently warm, away from drafts or cold windows. Sudden drops in temperature can stress the plant and inhibit its growth.
Protect the pad from extreme weather conditions
While peyote cacti are resilient, extreme weather conditions can be detrimental to their health. Protect the pad from freezing temperatures, heavy rain, or harsh winds. Consider moving the cactus indoors during colder months or providing a protective covering such as a frost cloth or plastic sheeting. Extreme weather can damage the pad or cause root rot, so it’s important to be mindful of the environment and take necessary precautions.
Watering the Pad
Water sparingly
When it comes to watering your peyote cactus, less is more. These desert plants have adapted to survive in arid environments with limited water availability. Overwatering can lead to root rot and other moisture-related issues. Water the pad sparingly, allowing the soil to dry out between waterings. A general rule of thumb is to water the cactus when the soil is completely dry up to a few inches deep.
Allow the soil to dry between waterings
To prevent overwatering and promote healthy root development, it is crucial to allow the soil to dry out between waterings. Before watering, check the moisture level of the soil by inserting your finger into the soil up to the second knuckle. If it feels dry, it’s time to water. If it still feels slightly moist, wait a few more days before the next watering. Consistency is key in maintaining the right moisture balance.
Avoid overwatering to prevent root rot
Overwatering is the leading cause of plant death, especially for succulents like the peyote cactus. When in doubt, it is always better to underwater than overwater. As a desert plant, peyote cacti have adapted to survive in dry conditions and store water in their tissues. Water thoroughly but infrequently, ensuring that excess water drains out of the pot. Over time, you will develop a watering routine that works for your specific plant.
Fertilizing the Pad
Use a balanced cactus fertilizer
To promote healthy growth and replenish essential nutrients, it is recommended to fertilize your peyote cactus with a balanced cactus fertilizer. Look for a fertilizer specifically designed for cacti and succulents, as it will have the right nutrient ratios to support their unique needs. Follow the package instructions for proper dilution and application rates.
Apply the fertilizer according to the package instructions
Each fertilizer brand may have slightly different application instructions, so it is important to carefully read and follow the package instructions. Generally, fertilizers are applied once every few months during the growing season, typically from spring to early fall. Avoid overfertilizing, as this can lead to nutrient imbalances and negatively impact the health of your peyote cactus.
Fertilize once every few months during the growing season
Peyote cacti have a slower growth rate compared to many other plants. Therefore, it is not necessary to fertilize them frequently. Fertilize your peyote cactus once every few months during the active growing season, which typically spans from spring to early fall. This will provide your plant with the necessary nutrients to support healthy growth without overfeeding it.
Managing Pests and Diseases
Keep an eye out for pests like scale insects or mealybugs
Like any other plant, peyote cacti are susceptible to pests. Common pests that may affect your cactus include scale insects, mealybugs, and spider mites. Regularly inspect your plant for any signs of infestation, such as sticky residue, cotton-like clusters, or small webs. Early detection is key to preventing pests from causing significant damage.
Treat pests with appropriate insecticides or soapy water
If you notice pest activity on your peyote cactus, take action promptly to prevent further infestation. Treat the affected areas with appropriate insecticides specifically formulated for cacti or use a natural alternative such as neem oil. Alternatively, you can use a simple solution of mild dish soap and water to wash off the pests. Reapply treatments as directed until the infestation is resolved.
Watch for signs of common diseases like root rot or fungal infections
In addition to pests, peyote cacti can also be prone to diseases such as root rot or fungal infections. Overwatering, poor drainage, or unsanitary growing conditions can contribute to these issues. Keep an eye out for signs of wilting, discoloration, or soft spots on the pad or roots. If you suspect a disease, take immediate action by adjusting watering practices and ensuring proper ventilation to prevent further spread.
Pruning and Propagation
Trim off any damaged or yellowing parts of the pad
Regular pruning is essential to maintain the health and appearance of your peyote cactus. Remove any damaged or yellowing parts of the pad using clean, sharp pruning shears. This will not only improve the overall aesthetics of the plant but also help prevent the spread of diseases or infections. Make clean cuts close to the main stem to encourage proper healing.
Propagate the pad by removing offsets or pups
Peyote cacti can be propagated by removing offsets or pups, which are the smaller plants that grow from the base of the main plant. Carefully separate these offsets from the parent plant using a sharp, sterile knife. Be gentle to avoid causing any damage. Once separated, allow the offsets to callus for a few days before planting them in a well-draining soil mix.
Allow the propagated pads to callus before planting
Similar to preparing the original pad, it is important to allow the propagated pads to callus before planting them. This will help protect them from rotting and promote successful growth. Place the callused offsets on a flat surface in a well-ventilated area for a few days to allow the cut ends to dry and form a protective layer. Once callused, follow the same planting steps mentioned earlier.
Harvesting and Drying Peyote
Wait until the peyote buttons reach maturity
Peyote cacti produce small, button-like structures known as “peyote buttons.” These buttons contain the psychoactive compounds for which peyote is renowned. It is important to wait until the peyote buttons have reached maturity before harvesting them. This typically takes between four to six years from planting, allowing the buttons to develop their full potential.
Carefully cut off the buttons from the pad
To harvest the peyote buttons, use a clean, sharp knife or scissors to carefully cut them off from the pad. Take care not to damage the main plant or the remaining buttons. Cut the buttons at the base, as close to the pad as possible. Handle the harvested buttons with care to avoid bruising or damaging them.
Dry the harvested peyote buttons in a well-ventilated area
After harvesting, it is crucial to dry the peyote buttons properly to preserve their potency and prevent spoilage. Place the harvested buttons in a well-ventilated area away from direct sunlight. Allow them to air dry for several weeks until they become completely leathery and hard. Once dried, store them in airtight containers away from moisture and extreme temperatures.
Growing peyote cactus from a pad can be a rewarding experience for plant enthusiasts, offering a unique glimpse into the world of these fascinating and valuable plants. By following the steps outlined in this article, you can ensure the proper care and cultivation of your peyote cactus, from selecting a healthy pad to harvesting and drying the precious peyote buttons. Remember to be patient, as peyote cacti have slower growth rates, and enjoy the journey of nurturing this beautiful and sacred plant.